You know that gap you can get when joining your work in the round? It never looks good, but when knitting at a larger gauge, it's all the more visible. Since Haddie, my new bulky-gauge hat just came out this week, I thought I'd share what I do to prevent the gap when using the long-tail cast-on.
A cleaner join
Following your pattern's instructions, cast on the required number of stitches, plus one extra. Do not turn work. The public side of your cast-on will be facing you. Bring the tips of your needles together, ready to work in the round.
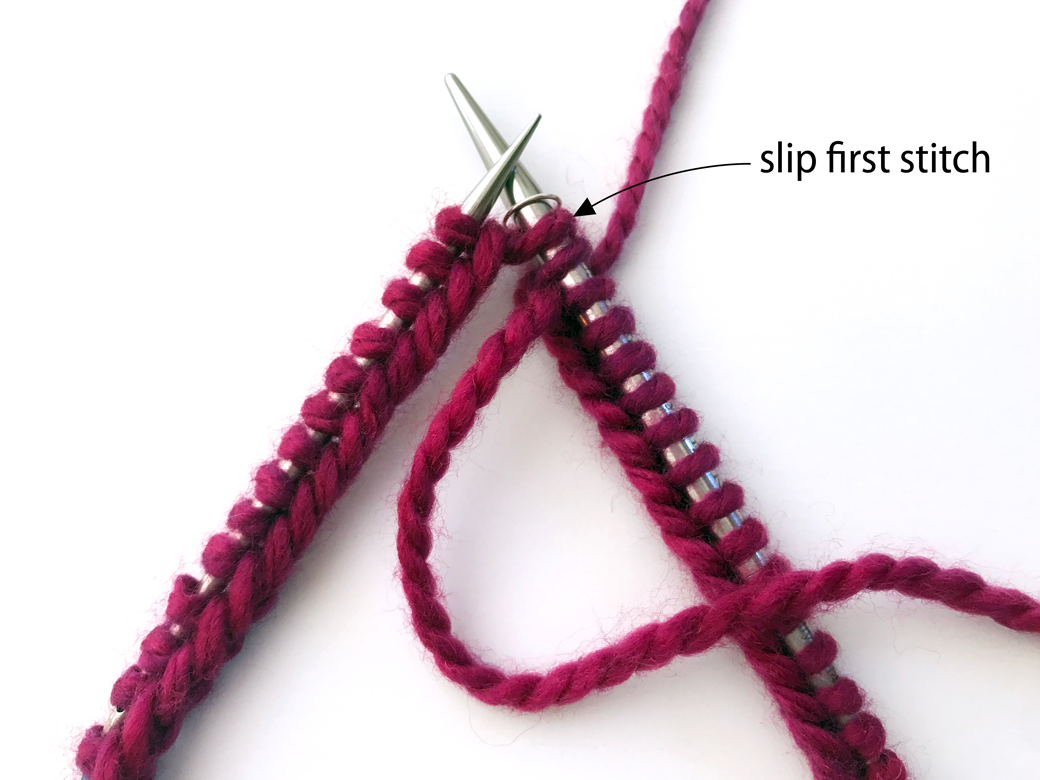
Joining round: Slip the first stitch purlwise with the working yarn in back (this stitch does not count as part of your pattern), place a marker for the beginning of round, then work as directed by your pattern until two stitches remain before the marker. These will be the final cast-on stitch and the first slipped stitch. Continuing in pattern, knit or purl these two stitches together to join the work in the round.

Note: If you are working a ribbing pattern that begins with a slipped stitch, as for Haddie, you'll be slipping two stitches in a row at the very beginning of the round. Don't worry, it works!
Joining in this manner also makes it easier to avoid twisting the work when you join, since that first round of knitting makes it easier to detect a twist. When you get to those two final stitches, check your work, and untwist if necessary before working the stitches together.

That's all there is to it. This method makes a join so clean that you may struggle to find it later!
By the way, you may have noticed that my needle tips are two different sizes. I use interchangeable needles, and whenever I am working in the round, I use a smaller tip on the left end. This allows my stitches to move more freely on the needle. Using a smaller needle as a 'feeder' will not affect your gauge, as it is the right needle that creates and sizes the stitch.